
Imagine this: You’ve just moved into your dream home. The walls are bare, the colors outdated, and you’re eager to put your personal stamp on every room. Yet, the challenge of residential painting feels overwhelming. You wonder, where do you even start? How do you ensure the paint job lasts, looks professional, and truly enhances your living space? If you’ve ever faced these questions, you’re not alone.
Residential painting is more than just picking a color and rolling paint on the walls. It’s an art and a science that, when done right, can dramatically elevate the comfort, aesthetic, and value of your home. This ultimate guide to residential painting is crafted to make that process straightforward, enjoyable, and successful.
In this comprehensive article, you’ll discover how to master residential painting with lasting results. We’ll start by exploring the best practices for selecting the ideal paint type and color schemes tailored to your lifestyle and home environment. You’ll learn about crucial preparation steps that often get overlooked but are essential to avoid peeling, cracking, or uneven finishes.
We’ll also delve into expert techniques for application, whether you’re planning to do it yourself or hire professionals. Understanding brushes, rollers, and spray painting methods will empower you to make informed decisions that save time and resources. Plus, we’ll uncover tips on protecting your furniture and floors to keep your home clean throughout the process.
By the end of this guide, you’ll not only have the knowledge to tackle residential painting with confidence but also practical insights to ensure your freshly painted walls remain vibrant and damage-free for years to come. Whether you’re sprucing up a single room or transforming your entire house, this guide will be your companion to achieving beautiful, lasting results.
So, if you’re ready to turn your living spaces into a true reflection of you, join us as we unlock the secrets to successful residential painting. Your home is about to get a makeover that’s not just skin-deep but built to last.
Key Takeaways
- Prep is everything: clean, repair, sand, and prime to prevent peeling and uneven sheen.
- Pick low-VOC, high-durability paints matched to surface (drywall, wood, masonry).
- Sample first: test colors in natural and artificial light before committing.
- Use the right tools (quality brushes/rollers; correct nap) for smooth, pro results.
- Cut in edges, then roll in a wet edge pattern; apply two thin coats.
- Protect rooms: tape carefully, cover floors/furniture, remove plates and hardware.
- Control conditions: paint in mild temps/low humidity; ensure ventilation.
- Don’t skip primer on repairs, stains, bare wood, or drastic color changes.
- For exteriors, address caulk, flashing, and moisture issues before painting.
- Maintain finishes: gentle cleaning and timely touch-ups extend life and color vibrancy.
Why Residential Painting Is More Important Than You Think
When we talk about residential painting, many envision simply changing wall colors or freshening up a room’s appearance. However, the reality of residential painting goes far beyond aesthetics; it plays a pivotal role in maintaining the structural integrity and enhancing the overall value of your home. Understanding the importance of residential painting is the first step toward ensuring lasting results that protect your investment and create a welcoming, beautiful living space.
What Is Residential Painting?
Residential painting refers to the process of applying paint and other finishes to the interior and exterior surfaces of a home. It includes walls, ceilings, doors, trims, and even exterior siding or brickwork. Unlike commercial or industrial painting, residential painting focuses on creating a comfortable, personalized environment while also defending the home against environmental damage such as moisture, UV rays, and wear and tear.
Why Is Residential Painting Important?
1. Protection Against Elements: The exterior paint acts as a vital barrier against harsh weather conditions. Properly applied residential paint prevents moisture from seeping into walls, which can lead to mold, mildew, or structural damage. In fact, the Environmental Protection Agency (EPA) highlights that homes without adequate protective coatings can experience up to 50% faster deterioration of exterior surfaces.
2. Enhances Home Value: According to a study by the National Association of Realtors, homes with a fresh, neutral interior paint have a 50%-100% faster sale rate compared to those with outdated or damaged paint. Residential painting provides a relatively low-cost method to boost a home’s resale value and market appeal.
3. Improves Indoor Air Quality: Using high-quality, low-VOC (Volatile Organic Compounds) paints during residential painting contributes to healthier indoor air, reducing risks associated with pollutants and allergens. This is especially important for families with children, the elderly, or individuals with respiratory sensitivities.
4. Esthetic Upgrade and Personal Expression: Colors deeply affect mood and comfort. Residential painting allows homeowners to tailor their living spaces to reflect their personalities, create harmony, or influence atmosphere, increasing overall satisfaction and emotional well-being.
The Impact of Professional Residential Painting
Consider the story of the Johnson family, who moved into a charming but aging 1950s home. When they first bought it, the exterior paint was chipped and faded, exposing wood surfaces to the harsh sun and rain. After investing in a comprehensive residential painting project, including repairing the siding and using high-quality exterior paint, the transformation was remarkable. Not only did their home’s curb appeal skyrocket, attracting admiring neighbors, but the repairs prevented further moisture damage that could have cost tens of thousands in future repairs. The Johnsons reported feeling more pride and joy living in their refreshed home, illustrating how effective residential painting yields practical and emotional rewards.
Residential Painting in Numbers
– Homes with well-maintained exterior paint have been shown to increase in value by an average of 5-10%.
– Data from HomeAdvisor reveals that the average cost of a residential painting project ranges between $2,500 and $4,000, a relatively modest price for long-term protection.
– A survey conducted by Sherwin-Williams found that 83% of homeowners who invested in quality interior painting said it dramatically improved their satisfaction with their home environment.
In conclusion, residential painting is not just about changing colors; it is a critical maintenance task and an opportunity to improve your home’s value, appearance, and comfort. As you dive deeper into this ultimate guide to residential painting, keep in mind that the choices you make today will have lasting effects for years to come. This foundational understanding sets the stage for making informed decisions that lead to impressive, durable results.
How to Apply Residential Painting Step by Step for Lasting Results
When it comes to transforming your home with residential painting, a well-executed process is key to achieving a beautiful and durable finish. Whether you’re painting a single room or your entire house, following a clear, step-by-step approach ensures your efforts pay off with lasting results. In this section, we’ll walk you through each essential stage of residential painting, providing practical tips and expert advice to help you master this craft with confidence.
Step 1: Plan and Prepare Your Painting Project
Before picking up a brush or roller, thorough planning and preparation set the foundation. Here’s what to consider:
– Choose the Right Paint: Depending on your surface (wood, drywall, brick), select premium residential paint formulated for durability and finish quality.
– Calculate Paint Quantities: Measure the area to avoid buying too little or too much paint.
– Gather Supplies: Brushes, rollers, painter’s tape, drop cloths, primer, sandpaper, and cleaning materials.
– Set a Timeline: Weather is crucial if painting exterior walls, choose a dry, mild day.
– Protect Your Space: Move furniture, cover floors and fixtures with drop cloths, and tape off edges for clean lines.
Step 2: Surface Preparation
Proper surface prep is the secret weapon in residential painting. Neglecting this can lead to peeling or uneven paint later on.
– Clean the Surface: Remove dust, dirt, grease, and mildew using a mild detergent or specialized cleaner.
– Repair Imperfections: Fill cracks, holes, and dents with spackling or wood filler. Sand smooth once dry.
– Sand Surfaces: Lightly sanding glossy walls or trim helps paint adhere better.
– Prime When Needed: Apply a quality primer on repaired areas, raw wood, or stained patches to ensure uniform coverage.
Example: For exterior wood siding, sanding old peeling paint and applying a stain-blocking primer can dramatically boost the paint’s lifespan.
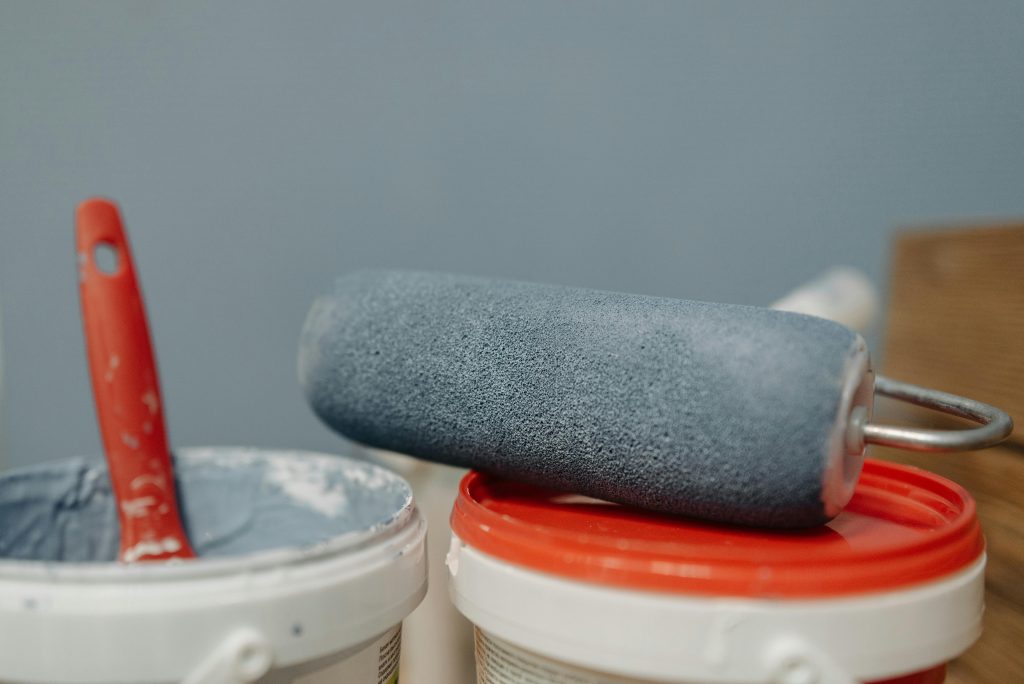
Step 3: Choosing Painting Techniques and Tools
Using the right technique makes a world of difference in the outcome of your residential painting project.
– Brushes: Ideal for edges, corners, and detailed trim work. Choose synthetic bristles for latex paint.
– Rollers: Speed up larger wall coverage. Use nap length appropriate for the surface texture, short for smooth, longer for rough.
– Sprayers: Best for large exterior areas but require practice to avoid overspray.
Pro Tip: “Cutting in” with a brush around edges before rolling walls creates a professional, clean look.
Step 4: Applying the Paint
With surfaces prepped and supplies ready, it’s time to apply your paint smartly.
– Start with the Ceiling and Trim: Painting ceilings first or at least taping them off prevents accidental drips on freshly painted walls.
– “Cut In” the Walls: Use a brush to paint the edges near ceilings, corners, and trim.
– Roll in Sections: Use a W or M shaped motion with your roller, blending each section while the paint is still wet to avoid lines.
– Apply Multiple Coats: Two coats typically provide the best coverage and durability, allow proper drying time between coats.
Step 5: Clean Up and Maintain
Finishing your project professionally includes proper cleanup and care to preserve your labor’s results.
– Clean Brushes and Rollers: Use water and soap for latex paints or appropriate solvents for oil-based products.
– Remove Tape Carefully: Pull tape slowly at an angle while paint is still slightly wet to avoid peeling.
– Inspect for Touch-ups: Check for missed spots or thin areas and carefully fix them.
– Maintain Painted Surfaces: Regular cleaning and prompt touch-ups keep your walls looking fresh for years.
Visual Guide: Residential Painting Workflow
| Step | Key Actions | Tools Needed | Tips for Success |
|———————|———————————–|——————————–|———————————|
| 1. Plan & Prepare | Choose paint, protect area | Paint samples, tape, drop cloth | Measure twice, buy quality paint |
| 2. Surface Prep | Clean, sand, fill, prime | Sandpaper, filler, primer | Don’t skip priming if needed |
| 3. Select Tools | Brushes for edges, rollers for walls| Brushes, rollers, sprayers | Match roller nap to surface texture |
| 4. Paint Application| Cut in edges, roll walls, 2 coats | Brushes, rollers | Blend wet edges for smooth finish|
| 5. Cleanup & Finish | Clean tools, remove tape, touch up | Soap, water, scraper | Handle tape gently to avoid peel |
By following these detailed steps, your residential painting project will not only look incredible but will also withstand the test of time, bringing lasting beauty and protection to your home. Remember, attention to preparation and technique are the pillars of success when it comes to painting residential spaces. Ready your brushes and get painting!
Tips for Achieving Lasting Results in Residential Painting:
🎨 Choose Quality Paints: Use high-grade, durable paints designed for residential use to ensure longevity and vibrant color retention.
🛠️ Prepare Surfaces Thoroughly: Clean, sand, and prime surfaces to eliminate dirt, grease, and peeling paint for a smooth, lasting finish.
⏱️ Paint in Optimal Weather: Aim for mild temperatures and low humidity to prevent issues like bubbling, cracking, or extended drying times.
🖌️ Use the Right Tools: Invest in quality brushes, rollers, and sprayers suitable for the specific surface to achieve even coverage and professional results.
📏 Apply Even Coats: Avoid overly thick or thin layers by applying multiple even coats; this enhances durability and appearance.
📅 Plan Your Schedule: Allocate enough time between coats for proper drying, avoiding rush that compromises finish quality.
🔍 Inspect and Repair: Address cracks, holes, or wood rot before painting to prevent future peeling and structural issues.
🧼 Clean Up Properly: Wash brushes and tools immediately after use and dispose of waste responsibly to maintain equipment and environmental safety.

Key Concepts
When delving into the world of residential painting, it is essential to grasp not just the physical act of applying paint, but the profound layers of meaning and strategy that lie beneath this transformative craft. Residential painting, in its essence, is much more than a mere cosmetic upgrade; it is an intricate blend of art, chemistry, and psychology, all woven together to breathe new life into personal spaces.
The Canvas of Home: Walls as Silent Storytellers
Imagine your home as a grand canvas, where each room serves as a chapter in your life’s story. The walls are silent storytellers, bearing marks of time and experience. Residential painting offers a unique opportunity to rewrite these walls, turning faded narratives into vibrant expressions of identity and emotion. Much like a skilled novelist revising a draft, a painter chooses hues, textures, and finishes to evoke moods, whether calming blues that cradle the mind or fiery reds that ignite passion. Every brushstroke contributes to an invisible dialogue between space and inhabitant.
The Science Beneath the Surface: Chemistry of Paint
Beyond aesthetics, paint represents a sophisticated chemical concoction designed for durability and protection. It acts as a shield, safeguarding wood, drywall, or concrete from environmental adversities such as moisture, UV rays, and temperature fluctuations. Understanding residential painting requires appreciating this nuanced balance: paint must adhere effectively, resist deterioration, and maintain its brilliance over years. The journey from raw pigment and binders to a perfect coat on your wall is a marvel of modern material science, where each component plays a pivotal role in the longevity and performance of the finish.
Texture and Finish: The Language of Touch and Light
In the theater of interior spaces, paint texture and finish dictate how light dances upon surfaces, altering perception. Consider the difference between a matte finish and gloss: the former absorbs light, offering a soft, intimate ambiance reminiscent of chalkboard walls that invite reflection; the latter reflects light sharply, like a mirror’s edge, injecting rooms with energy and liveliness. These choices are akin to deciding the tone of a musical piece, smooth and subdued or bright and dynamic. Texture, too, can add layers of complexity, from the subtle grit of eggshell to the boldness of textured patterns, each shaping how a room feels both visually and tactilely.
Emotional Resonance: Color Psychology
Residential painting is deeply entwined with color psychology, the science of how hues influence human emotions and behaviors. The walls of a home can act as silent therapists; serene greens might invoke tranquility reminiscent of a forest’s embrace, while sunny yellows can spark creativity and optimism, much like the first light of dawn breaking through a window. Thus, choosing paint colors is akin to curating an emotional soundtrack for daily life, consciously crafting atmospheres that nurture well-being and comfort.
The Temporal Dimension: Painting as a Statement in Time
Every coat of paint also captures a moment in time, akin to an artist’s signature on a masterpiece. Over the years, a painted space becomes a living archive of personal growth and taste evolution. Sometimes, the choice of vintage pastel hues or bold contemporary shades reflects wider cultural and societal trends, weaving individual homes into the larger tapestry of design history. Residential painting, therefore, stands at a crossroads of permanence and change, simultaneously preserving memories and inviting renewal.
Durability and Maintenance: The Marriage of Art and Practicality
While the visual impact of residential painting is undeniable, its underlying purpose extends to durability and ease of maintenance. Paint must navigate the daily realities of family life, from playful children’s antics to the subtle wear of time. Like a well-tailored suit that balances style with comfort, paint formulations today are engineered to resist stains, mildew, and fading. This blend of resilience and beauty demonstrates how residential painting is a continuous negotiation between the ephemeral allure of aesthetics and the practical demands of living spaces.
In sum, residential painting transcends the simple act of coloring walls. It embodies a dialogue between human emotion, scientific innovation, and artistic expression. Each painted surface is a testament to this intricate interplay, holding within it stories, protection, mood, and memory, waiting to be discovered and appreciated by those who call the space home.
Frequently Asked Questions about Residential Painting
❓ What are the key steps involved in residential painting?
Residential painting begins with thorough surface preparation, including cleaning, sanding, and repairing walls. Then, priming ensures better paint adhesion and durability. Finally, applying high-quality paint in even coats leads to lasting results. Proper drying times between coats are essential to avoid peeling.
❓ How do I choose the right paint for my home’s interior and exterior?
For interiors, consider the room’s function and lighting; for example, washable paints are ideal for kitchens and bathrooms. For exteriors, select paints resistant to weather, UV rays, and mildew. Acrylic latex paints are popular for durability and color retention in residential painting projects.
❓ How long does residential painting typically last?
With proper surface preparation and quality materials, residential painting can last anywhere from 5 to 10 years indoors, and about 5 years or more for exteriors depending on climate exposure. Regular maintenance like cleaning surfaces and touch-ups extends the paint’s lifespan.
❓ Can I prepare and paint my home myself or should I hire professionals?
DIY residential painting is possible with patience and the right tools, especially for small projects. However, for complex surfaces or large areas, hiring experienced painters ensures better workmanship and longevity. Professionals often provide warranties and handle prep work efficiently.
❓ How much does a typical residential painting project cost?
Costs vary based on home size, paint quality, and labor rates. On average, residential painting may range from $1.50 to $4.00 per square foot. Exterior projects tend to be more expensive due to prep work like power washing and repairs. Getting multiple quotes helps find a competitive price.