
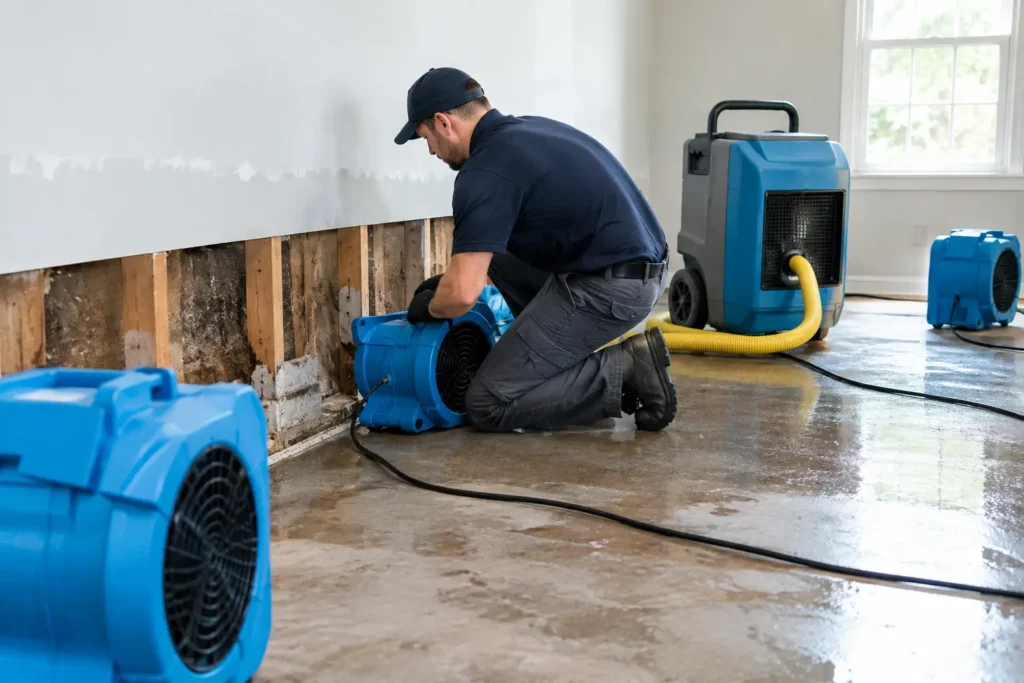
A pipe can stop leaking in minutes, yet the water it released may remain inside flooring, wall cavities, insulation, cabinets, and subfloors for days. That is why structural drying after water damage is not simply a matter of setting out fans. It is a controlled restoration process designed to remove hidden moisture, protect building materials, and help prevent mold growth and unnecessary reconstruction.
For a homeowner or business owner, the goal is straightforward: return the property to a clean, dry, stable condition as safely and efficiently as possible. The path to that result depends on where the water traveled, how long it was present, the type of materials affected, and whether the water was clean, contaminated, or sewage-related.
Table of Contents
ToggleWhy Fast Structural Drying Matters
Water moves farther than most people expect. A dishwasher leak can reach cabinets and adjacent flooring. An upstairs bathroom overflow can follow framing and wiring paths before appearing as a ceiling stain below. A flooded basement can wick moisture up drywall, insulation, and wood framing even after standing water has been removed.
When materials stay wet, the risks grow. Wood can swell, cup, or warp. Drywall may lose strength. Adhesives beneath flooring can fail. Insulation can hold moisture against framing. Most concerning, damp materials can create favorable conditions for mold growth.
Quick action often preserves more of the structure. It may mean drying a hardwood floor rather than replacing it, saving portions of drywall that have not been compromised, or avoiding a much larger mold remediation project. However, speed should not lead to shortcuts. Drying must be measured, monitored, and adjusted based on the actual conditions inside the property.
What Structural Drying After Water Damage Involves
Professional structural drying begins after the source of water has been stopped and immediate safety concerns have been addressed. If there is standing water, extraction comes first. Removing water with professional extraction equipment is far more effective than relying on towels, mops, or a household wet vacuum alone.
Inspection and moisture mapping
A restoration team first identifies the full scope of moisture. Visible damage tells only part of the story. Technicians use moisture meters, thermal imaging when appropriate, and other specialized tools to check walls, floors, ceilings, cabinets, trim, and affected contents.
This inspection creates a moisture map: a record of where water has traveled, which materials are wet, and what needs to be dried or removed. It also establishes a baseline for later readings. Without that baseline, there is no reliable way to confirm that structural materials have reached an acceptable drying condition.
Removing materials that cannot be safely dried
Not every wet material can or should remain in place. Clean water from a quickly addressed supply line leak may allow some materials to be dried successfully. By contrast, porous materials exposed to sewage, floodwater, or other contaminated water often require removal for health and safety reasons.
The decision also depends on the material itself. Non-porous surfaces may clean and dry well. Wet insulation, swollen particleboard, saturated carpet padding, or crumbling drywall may need to be removed so the framing and subfloor beneath can be properly dried. This can feel disruptive, but controlled removal is often the best way to limit damage and support a sound reconstruction.
Controlled airflow, dehumidification, and temperature
Drying equipment works as a system. Air movers increase airflow across damp surfaces, helping moisture evaporate. Dehumidifiers remove that moisture from the air so it does not settle back into materials. In some situations, specialty drying equipment may be used for hardwood flooring, wall cavities, or dense materials.
Temperature and humidity matter, too. A property that is too cool or too humid may dry slowly, even with equipment running. Restoration professionals monitor the drying environment and adjust equipment placement or capacity as conditions change. More equipment is not always better. Proper placement, containment when needed, and regular monitoring are what make the process effective.
Daily monitoring and documentation
Drying is not complete because a room feels dry to the touch. Technicians take ongoing moisture readings from affected materials and compare them to dry standards or unaffected areas of the property. They also document equipment, readings, conditions, and visible damage.
This documentation provides peace of mind for the property owner and can be helpful during an insurance claim. It shows the mitigation work performed, supports the need for repairs, and creates a clearer record of the loss from emergency response through reconstruction.
How Long Does the Drying Process Take?
Many properly managed water losses dry within several days, but no responsible contractor should promise the same timeline for every property. A small clean-water leak caught quickly may require limited drying. A burst pipe affecting multiple rooms, a long-term leak behind walls, or a basement flood can take longer and may require selective demolition before drying can begin.
Material type makes a difference. Solid wood framing dries differently than engineered flooring, drywall, plaster, concrete, or insulation. Weather and indoor humidity can also affect progress. Maryland’s humid summer conditions can make professional dehumidification especially important.
The best indicator is not the calendar. It is verified moisture readings showing that affected structural materials have dried to appropriate levels.
What Property Owners Should Do While Drying Is Underway
After emergency extraction and equipment setup, the most helpful step is to allow the drying plan to work. Keep drying equipment running continuously unless the restoration team gives different instructions. Turning equipment off overnight or because of noise can extend the drying period and increase the chance of further damage.
Avoid moving equipment, closing off rooms, or covering wet areas with rugs, furniture, or plastic. Keep children and pets away from cords, hoses, and affected work areas. If the loss involves contaminated water, avoid contact with damaged materials until trained professionals have evaluated the area.
It is also wise to save receipts for emergency expenses and keep copies of communication with your insurer. Take photos of visible damage if it is safe to do so, but do not delay emergency mitigation while waiting for an adjuster. Preventing additional damage is part of protecting the property.
When Drying Becomes Restoration and Reconstruction
Drying addresses moisture. It does not always return every damaged surface to its pre-loss condition. Once the area is dry and documented, repairs may include replacing drywall and insulation, reinstalling flooring, repairing trim, repainting, rebuilding cabinets, or restoring damaged ceiling sections.
Working with one experienced team from mitigation through reconstruction can reduce confusion during a stressful loss. The same team understands where water traveled, what materials were removed, and what needs to be rebuilt. It also helps keep the transition from emergency work to finished repairs organized and accountable.
For homeowners and property managers in Glen Burnie, Annapolis, Bowie, Columbia, and surrounding Maryland communities, Vinis Renovation & Restoration can help coordinate the process from emergency cleanup and moisture monitoring through repairs and complete reconstruction.
Frequently Asked Questions
Can I dry water damage with fans from the store?
Household fans may help with minor surface moisture after a small, clean spill, but they cannot confirm whether walls, subfloors, insulation, or cabinetry are dry. In some cases, adding airflow without proper dehumidification can move humid air through the property without removing enough moisture. For water that entered building materials, professional assessment is the safer choice.
Do wet walls always need to be removed?
No. It depends on the water category, how long the wall remained wet, the type of wall assembly, and the moisture readings. Some walls can be dried in place. Others require controlled removal to access wet insulation, framing, or hidden contamination.
Is mold guaranteed after water damage?
No, but the risk increases when materials remain wet. Fast extraction, controlled drying, and verified moisture monitoring are the practical steps that help reduce that risk. If mold is already present or suspected, the property may need a separate remediation plan before repairs begin.
Water damage is stressful, but uncertainty does not have to control the next steps. A prompt inspection, a documented drying plan, and careful repairs can protect what matters most: the safety, value, and comfort of your property.