
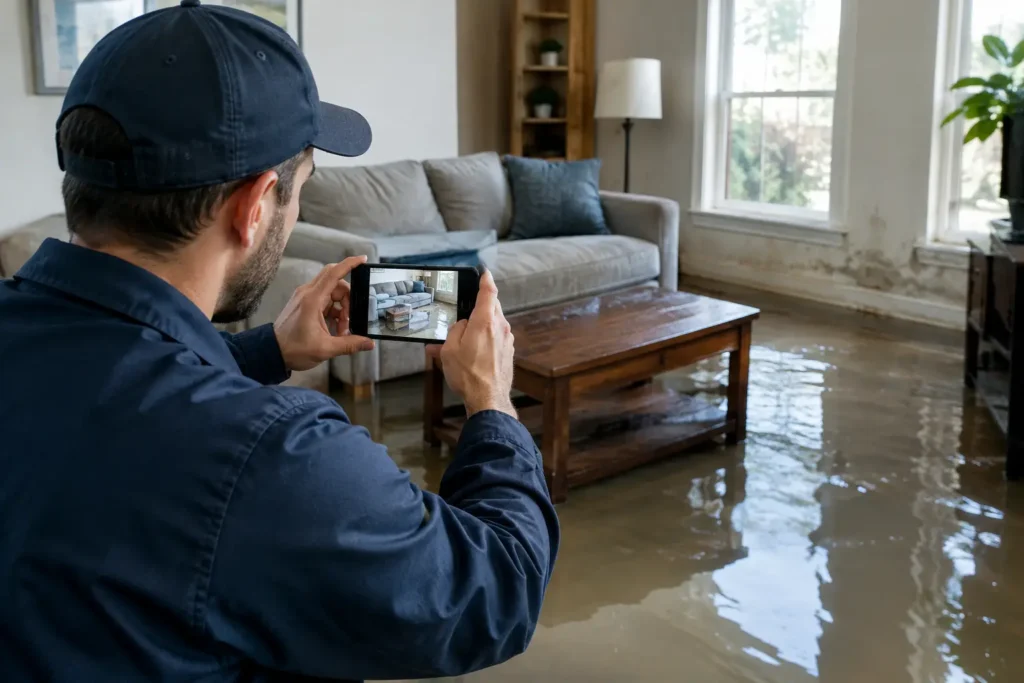
A flooded basement, burst supply line, or stormwater intrusion can turn a normal day into a series of urgent decisions. The best flood damage documentation begins before cleanup makes the damage less visible. Clear records help establish what happened, support productive conversations with insurance professionals, and give your restoration team a dependable starting point for drying, repairs, and reconstruction.
The goal is not to create a perfect file while water is spreading. Your first priority is safety and stopping additional damage where possible. Once the area is safe, a few organized photos, notes, and records can make the next steps far less stressful.
Table of Contents
ToggleStart Documentation Before Water Removal
If standing water is near electrical outlets, appliances, panel boxes, or structural damage, stay out of the affected area and contact a qualified emergency restoration professional. Do not enter a space with suspected sewage, contaminated floodwater, or a compromised ceiling. Safety comes before photographs.
When it is safe to document, take wide photos and video before moving contents or beginning extraction. Start outside the affected room and work inward. This creates context: it shows where the water originated, the path it traveled, and which spaces may have been affected.
Then capture closer images of wet carpeting, damaged baseboards, swollen flooring, stained drywall, saturated insulation, furniture, stored belongings, and visible water lines. Video can be especially helpful for showing the scope of a large loss, but it should supplement, not replace, still photos.
Avoid throwing away damaged materials or belongings until they have been documented and you have received direction from the appropriate insurance representative. In many cases, a restoration contractor can document removed materials as part of the mitigation process.
What the Best Flood Damage Documentation Includes
Good flood documentation tells a chronological story. It should show the source or suspected source, the areas affected, the emergency actions taken, and the condition of the property throughout drying and repairs.
Photos That Show Both Detail and Scale
Take photos from several angles. Include a wider image of the room, a mid-range image that shows the affected surface, and close-ups of specific damage. Photograph serial numbers or labels on damaged appliances and electronics when accessible and safe.
Use a familiar object for scale when it helps, such as a tape measure beside a water line or damaged section of flooring. Do not alter, clean, or stage the scene simply to make it photograph better. Straightforward, timestamped images are more useful than dramatic ones.
A Written Timeline
Write down the date and approximate time you first noticed the problem, along with what you observed. For example, note whether water was actively flowing from a pipe, entering through a foundation wall during heavy rain, or discovered after an appliance leak.
Continue the timeline as work proceeds. Record when water was shut off, when emergency extraction began, when temporary protection was installed, and when drying equipment was placed. Keep names and contact information for the professionals involved, as well as claim-related reference numbers if one has been assigned.
This record does not need to be complicated. A note on your phone is enough, provided you update it promptly and keep it with your photos and receipts.
An Inventory of Damaged Contents
For personal belongings, list the item, room, approximate age, condition before the loss, and any identifying information you have. Receipts, prior photos, manuals, model numbers, and warranty information can help establish what an item was.
Group small items when individual documentation is unrealistic. A photo and written description of several damaged storage bins, for instance, may be more practical than listing every single household item one by one. For high-value or specialty belongings, preserve as much identifying information as possible and seek direction before disposal.
Receipts and Emergency Service Records
Save receipts for reasonable emergency actions related to the loss, such as temporary protective materials or services needed to prevent additional damage. Keep invoices and work records from mitigation providers as well.
Professional restoration documentation often includes photographs, extraction logs, moisture readings, equipment placement records, drying notes, and an itemized scope of work. Those records show that the property was evaluated and dried methodically rather than simply treated as a surface cleanup.
Document Conditions During Drying, Not Just on Day One
Water damage can extend behind walls, beneath flooring, and into building materials that do not look wet from the surface. That is why documentation should continue after the initial emergency.
Trained restoration professionals use moisture meters, thermal imaging where appropriate, hygrometers, and other specialized tools to identify and monitor affected materials. Measurements taken over several days can help show whether drying is progressing as expected and whether materials can remain in place or require removal.
This is particularly important for flooded basements, hidden pipe leaks, and water intrusion around exterior openings. A dry-looking room is not always a dry structure. Thorough structural drying helps reduce the risk of lingering moisture, odors, material deterioration, and conditions that may support mold growth.
Ask your restoration provider how drying progress is being recorded. A clear explanation of moisture monitoring, equipment use, and recommended next steps gives property owners a better understanding of the work taking place.
Separate Mitigation From Reconstruction Records
Flood losses often involve two connected phases: mitigation and reconstruction. Mitigation focuses on emergency stabilization, water removal, cleaning, drying, and removal of unsalvageable materials. Reconstruction addresses repairs after the affected structure is dry and ready for restoration.
Keep records for each phase organized, even if one experienced team handles the entire project. The mitigation file may include emergency photos, moisture documentation, equipment logs, and removal records. The reconstruction file may include repair estimates, material selections needed to return the property to its pre-loss condition, progress photos, and completion details.
This separation makes it easier to understand what has already been addressed and what remains. It also helps prevent a common source of confusion: assuming that a dry property is automatically a fully restored property. Drying is essential, but it is often only the first stage of getting your home or business back to normal.
Common Documentation Mistakes to Avoid
Property owners are often under pressure, so missed details are understandable. Still, a few mistakes can make an already difficult process harder.
- Waiting until after cleanup to take the first photos can erase evidence of the original conditions.
- Taking only close-up images can make it difficult to understand where the damage occurred or how far it spread.
- Disposing of damaged contents without photos, a basic inventory, or direction can create avoidable questions later.
- Relying on surface appearance alone can overlook moisture trapped in building materials.
- Mixing receipts, emails, photos, and estimates across multiple devices makes it harder to locate important information when needed.
Create one digital folder for the loss and name files clearly. Using simple labels such as “Basement-water-line,” “Day-2-drying-readings,” or “Living-room-contents” is enough. Back up photos to a secure cloud account or email copies to yourself so they are not lost if a phone is damaged or replaced.
When Professional Documentation Is Worth It
For a small, contained incident, homeowner photos and a clear timeline may be sufficient to describe what happened. Larger losses, contaminated water, widespread saturation, and commercial property damage generally call for professional assessment and detailed restoration records.
A qualified restoration team can respond quickly, identify affected materials, remove water, set drying equipment, and document conditions throughout the process. This is especially valuable when water has moved beyond the visible area or when repairs will be needed after mitigation.
For Maryland property owners, Vinis Renovation & Restoration provides emergency water damage response and can help document the loss from initial mitigation through repairs and reconstruction. Having one accountable team manage the transition from cleanup to completed restoration can reduce gaps in communication during a stressful time.
Frequently Asked Questions
Should I photograph damage if I have already started cleanup?
Yes. Photograph current conditions, damaged materials, affected contents, and any visible water staining or deterioration. Make a note of what was already removed or cleaned, including the date and reason for the emergency action.
Can I use my phone for flood damage photos?
Yes. A phone camera is usually sufficient if images are clear, well lit, and organized. Take wide, mid-range, and close-up shots, and preserve the original files when possible.
What if water damage appears days after the leak?
Document it as soon as you notice it. Take photos, add the discovery date to your timeline, and arrange for a moisture inspection. Delayed staining, buckling, odors, or soft materials may indicate water traveled beyond the area first identified.
When flood damage disrupts your property, organized documentation gives you something valuable: a clear record of the problem and a clearer path toward restoring the space with confidence.